

May 8, 2023
How to Install a Ceiling Fan
Thinking of installing a ceiling fan? It’s one of the best investments you can make for your home. Ceiling fans help circulate warm air in the winter and help keep you cool in the summer. They can also help you save money on your utility costs by maintaining an even temperature in your home.
Before you decide which fan is best, let’s look at what’s involved when you install a ceiling fan in your home. Depending on your home’s existing wiring, it may be an easy afternoon project, or a challenging rewire that’s best left to a licensed electrician. No matter what’s involved with your ceiling fan installation the pros at Applewood can make sure it’s done right.
Considerations Before You Install a Ceiling Fan
Size and Style
The size and type of fan you install will depend on the room you’re installing it in. To determine what size fan blade you should have, divide the square footage of the room by four. The result will give you the length in inches. For example, a room that is 10’ X 12’ should have a fan with blades around 30 inches long (10 x 12 = 120 ➗4 = 30”).
If you’re replacing an existing light fixture, you’ll probably want to select a fan with a light. Also consider what type of switch you want: pull cord, wall switch or remote control.
Ceiling Type
If you have a high or slanted ceiling, you’ll want a fan that hangs down. If you have a low ceiling, you’ll want a flush mount ceiling fan. Regardless of your ceiling, fans must be installed at least seven feet above the floor and fan blades eight inches below the ceiling.
Mounting Option
You will need to securely mount your fan to prevent it from vibrating or coming loose. Typically, you secure it via a junction box that’s affixed to a ceiling joist. If you’re installing your ceiling fan in a location that already has a fixture, the existing junction box may work. If it’s the wrong size or style and not compatible with your fan, you’ll need to install a new one. If you’re starting from scratch, you’ll need to locate a joist to install your ceiling fan box.
In either scenario, you’ll want to ensure the mount is strong enough to hold the weight of your fan.
Wiring Option
If you’re replacing an existing fixture, like a ceiling light, you’ll have the wiring you need already at the junction box location. If you are installing a ceiling fan in a ceiling without any fixture, you’ll need to run the necessary wires from your home’s power supply to the fan junction. Depending which type of switch your fan has, you may also need to run wiring to a wall switch in the room.
Running new electrical wires from your home’s power supply is a dangerous job that’s best left to a professional. Not only do you want to avoid getting shocked, you’ll want to make sure that you’re using the right amount of electricity and that the circuit you’re using won’t be overtaxed.
How to Install a Ceiling Fan with Existing Wiring
If you’re installing a ceiling fan in a location that already has a fixture with a junction box, the task is relatively straightforward. If you’re not confident navigating electrical connections or holding a 40 pound fan atop a ladder, it’s best to have a licensed electrician perform the work. The instructions that come with your fan should mirror these steps:
1. Turn off the power
Before you unscrew anything, turn off the power to the existing fixture at the circuit breaker. Use a voltage tester to be sure no current is running through the fixture before you proceed.
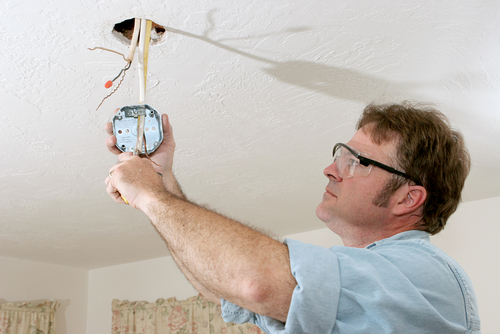
2. Remove the existing fixture
Unscrew the existing light or fan at the base and carefully remove it from its fittings without dropping it. You may need an extra set of hands. Beneath the base you’ll find several wires. Disconnect the wires by unscrewing the plastic connector covers. You should now be able to safely remove the old fixture from your ceiling.
3. Replace the existing ceiling box (if necessary)
If your existing box is the wrong size or not strong enough to support the weight of your fan, you’ll need to replace it. Many fans come with a junction box and a brace that installs between two joists. Remove the mounting screws on your current box and replace it with the new one. You may have to drill new holes or cut additional room in your ceiling to accommodate it. This is where hiring a professional may be worthwhile so that your box is properly mounted without damaging your ceiling.
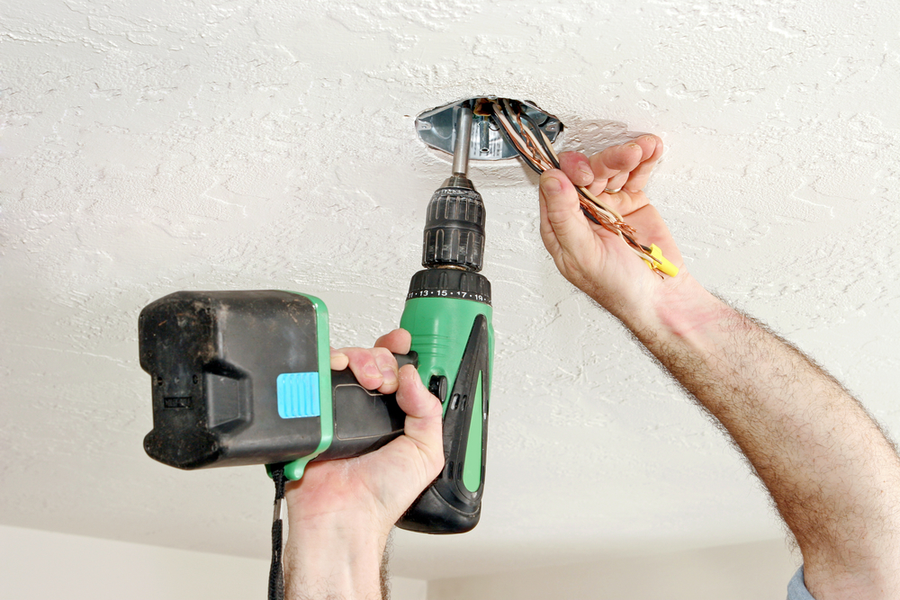
4. Connect the wires
Follow the manufacturer’s instructions and assemble your new fan. It’s easiest to mount the motor with the downrod before you attach the blades. Connect the wires: white neutral to white fan wire, bare or green ground wire to fan ground wire and black hot wire to black fan wire. Secure the wires tightly with plastic connector covers.
5. Mount your fan
Fasten the base of your fan motor to the ceiling box using mounting screws. It may help to have an extra set of hands to hold it while you tighten the screws.
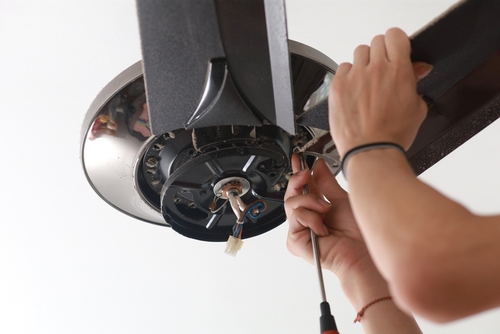
6. Assemble your fan
Once your fan base is secure, you can add the blades and any light fixtures. The light fixture may require additional wiring.
7. Test your fan
Restore power to the circuit and test that your fan functions properly. If your fan fails to power up or if it wobbles as it spins, it may need further help. If you smell smoke or see sparks, turn the power back off immediately and call an electrician. There’s no shame in having the professionals check your work (and prevent an electrical fire).
How Applewood Can Install a Ceiling Fan without Existing Wires
Adding a ceiling fan to a room that doesn’t have an existing fixture on the ceiling is a more involved task. It requires you to run new wiring through your walls and across your ceiling to power the fan. This work is difficult and dangerous and should only be completed by a licensed electrician.
To help you better understand what is involved with this type of install, we’ll cover the steps your electrician would take to get your fan operational.
Determine your fan’s location
As with the above installation, you’ll want to carefully select the location where your fan will be mounted. You’ll want it seven feet above the floor and 8-10 inches from the ceiling. Additionally, you’ll need to choose a location free of plumbing pipes and other obstructions with joists suitable for mounting your ceiling box to. Your Applewood technician can ensure that your chosen location is suitable.
Dedicate a power source
Once we have the location determined, we’ll need to route power to it. This may come from existing outlets or fixtures in the room or via a new line from your electrical panel. Regardless of where the power comes from, we’ll need to run new lines up to your new ceiling box.
Install the junction box
To start your installation, we’ll need to drill a hole in your ceiling large enough for the junction box to nest in. Ideally, we’ll secure it to a crossbar between two joists so that it can easily bear the load of your fan.
Run new wires
Your Applewood electrician will run new electrical wires through your ceiling to the power source. If we’re wiring your fan to a wall switch, we’ll also run those wires through your wall.
Assemble your fan
Once your box is installed and has a dedicated power source, we can assemble your fan as above and complete the installation.
Ceiling Fan Installers Near Me
Hopefully, you now have a good idea of what’s involved when you install a ceiling fan in your home. Whether you have existing wiring or need new lines run, hiring a professional will ensure that you get the best fan for your needs. Applewood’s home services team is ready to help. Call us today to learn more or schedule your ceiling fan install now.